Tuesday, 30 May 2017

Push Lawn Mower From Freecycle


I came back from an overnight stay as we attended our old neighbours daughters wedding and found that I had managed to get a Push Lawn Mower on Freecycle for the Allotment,  it's virtually new and works like a dream I'm well chuffed.

Andy had cut the grass front and back and asked if I wanted the large sack of cutting, so I collected them when I dropped off my daughter and took them to the allotment for composting.

Saturday, 27 May 2017

My Comfrey Cup Runneth Over

It's been 16 days since my last visit when there was about 5mm of comfrey in the bottom of my milk bottle under the comfrey pipe, but on my visit this morning I found that my milk bottle of comfrey had literally runneth over!

The weight in the pipe was no longer protruding from the top of the pipe and looking at how much I had to pull it back up the comfrey level was about halfway down the pipe.

The milk bottle was swapped out for an empty one and the full one capped and moved to one side. Then two square flower buckets of comfrey was cut up and thrust down the pipe until once again half of the weight was protruding from the top of the pipe.

The concrete blocks and the paving slab for the comfrey water butt need to be transported from Mill Green Allotment to Spencer Road at the earliest opportunity so I can have comfrey on draft.  

I could wait no longer to put the air onions in, so they have gone into the end of the bed three along with 15 bunches of spring onions as I have not had time to dug the air onion bed 2 or fabricate the raised bed out of the scaffold boards.  

One would not believe that I cleared the weeds from the onion beds 3 & 5 about a fortnight ago, the little rain we've had along with the sunny warm days and the weeds have really gone for it. I didn't have time to weed both the onion beds again, only half of bed 3. I have been promised so mulch from Marshalls to trial that may help keep the weeds at bay.

I did however manage to plant the last 10 Estima potatoes into bed 4 leaving 9 locations for some other potatoes so that's priority next visit.  

Monday, 22 May 2017

Sprouts & SoilFixer SF60 Potato Test

The year I have managed not to kill off the sprouts and have 3 of 5 different varieties and I selected the best two and planted them in the bed  Cromwell, Montgomery, Eveham Special, Bedford Darkmar 21 & Rubine.

The spares will remain in the coldframe as reserve. For more information on the varieties see Sowing Brussel Sprouts Blog Post
The SoilFixer SF60 Super Soil Improver biochar/colloidal humus matrix acts as ‘sponge’ for water and essential nutrients – storing them ready for use. The ‘sponge’ matrix supports increased levels of soil microbes. The microbes (notably mycorrhizal fungi) can access the stored nutrients. They form symbiotic relationships with plant roots and supply nutrients to the roots. This mechanism is sometimes described as ‘improved soil health leading to improved plant growth’. (More detail around SF60, the role as an improver versus fertiliser, versus compost can be found in the SoilFixer SF60 FAQ blog post)

The test mixes on Mill Green Allotment in front of Bed 12 Brussel Sprouts are from left to right:-  

1) My Own Compost & Coir 50:50 
2) My Own Compost & Coir with SF60 & 5% by volume
3) My Own Compost & Coir with SF60 & 10% by volume
4) My Own Compost & Coir with SF60 & 20% by volume
5) My Own Compost & Coir with Potato Fertiliser
6) My Own Compost & Coir with SF60 & 5% by volume with Potato Fertilizer

This is a bit of an adjustment to what I had planed to test, but I'm running late this year due circumstances outside my control and normally these would have been started early in the greenhouse at the end of March, but as I never really got the greenhouse clear enough I've waited for the last frost plus a couple of weeks.

In about 13 weeks when the foliage begins to turn yellow and die back I will harvest all six buckets and compare the weight and number of spuds from each bucket, As I'm using the Marshalls PotatoPots I may have a sneak peek at 5 & 10 weeks in before harvesting.   


Tuesday, 16 May 2017

The Gate Returns & Wicks 3 for 2 Offer.


Well it actually looks like Idverde who have won the Parks Contract with the local Authority can perform faster than the Local Authority and the gate is back up in record time.


I've started potting up the Tomatoes, and hardening off the ones inside the waiting buckets as I have run out of compost.

A visit to Wicks and I have managed to pick up a 3 for 2 offer on Westland Multipurpose Compost 100L with my 10% Discount app on my phone 300 Litres for around £15 is a good deal.

I normally use B&Q Verve but the 125L packs are just too heavy and large to handle easily. And buying 3 x 70L for a £10 is just not value for money.

B&Q could do with taking a leaf out of Westland book and reduce the size and weight to make them more manual handling safe.

One has to ask the question have B&Q never heard of the Manual Handling regulations?

For the moment my time is booked for decorating in advance of new carpet being laid before the stair lift is fitted, so once that's done I will be able to open the Westland MPC and see how it compares with the Verve. I do always use the Westland seedling compost but I have not tried their MPC before. I hoping the quality is as good as their seedling compost, I have never been disappointed with their products yet but we will see.

Sunday, 14 May 2017

Where Has The Gate Gone !


My Sister-In-Law offered another giant sack and a half of cut grass that was collected and taken to Mill Green Allotment, but when I got there the gate and fence had been removed. I had reported that a lorry had driven into the post and had pushed it over resulting in the breaking of two of the three hinges on the gate. My brother -in-law had managed to prop it up temporally.


I fitted the Mosquito Net to protect fruit on Cherry tree  

At £3.99 each from ebay It's a no brainer and it covers the tree really well.

Thursday, 11 May 2017

Update Comfrey Compost and Onions

Here is an update on the comfrey on Spencer Road allotment Plot 23B


There is only 29 days between the top two photographs


There are 16 more days between the second and third making 45 days between the top and bottom photograph.

Such is the rate of growth of comfrey in its second year


I have cut it back and placed two layers of comfrey in Dalek 2 either side of a layer of grass and watered it in as it was placed.


The 2 litre pop bottle full of sand weight has dropped further into the pipe telling me that the consolidation and rotting process is on its way.

In the bottom of the milk bottle is some nice dark semi pure comfrey, a very small amount of water was added originally to wet the comfrey to assist in kicking off the rotting down process.

Once the weight can no longer be seen the pipe will be topped up with more cut comfrey


The Estima Spuds in bed 2 have recovered from the frost scorching and are starting to find their way through the holes in the weed membrane. Bed 4 in the background was uncovered and due to the lack of rain the leaves have not degraded as much as I hoped for and as I didn't have time to plant the remainder of the spuds I cut the comfrey and covered then added more leaves to the bed and gave it a good drowning.


The Japanese and Radar onions are doing well in bed 6 but were in desperate need of a good drowning.


The spring onions were added to the Red Onion Bed 3 and watered in


I'm a little disappointed in the lack of progress of the tree onions to grow, by now I had thought they would have been much higher than they are.


I started setting up the top half of the watering system around the beds that are already in place basically because it was all so dry and needed watering badly.

Two hours goes much too fast, there is so much still to do and so little time to get it done in

Wednesday, 10 May 2017

Protecting Fruit Trees


A big thank you to Sam Williams who posted on the Facebook Allotment Growers UK forum, the idea of using Mosquito Nets to protect fruit on trees. At £3.99 each from ebay I now have an easy way of making sure I actually get some of the Cherries off my Cherry trees this year.

Saturday, 6 May 2017

It's World Naked Gardening Day Today


So I will not be visiting the allotment today! for more information about World Naked Gardening Day see here


Thursday, 4 May 2017

Tuesday, 2 May 2017

Watering System For Spencer Road


On the weekend whilst shopping I picked up some three way male hose connectors and some female and female stop connectors as they were being sold at 50p each at TESCO.


The female stop connectors stop the water from flowing when there isn't something installed and after the problems I have had with the spray guns this year leaking on Mill Green after getting them out of storage and re fitting them. I have decided to install a stop connector at the end of each hose, so I can move the head from pipe to pipe rather than buy an end for each pipe.

Like Mill Green the intention is to limit the amount of dragging the hose around the plot by installing a system of hoses from left to right in the diagram above, one hose covers the Greenhouse, the next Beds 1-4, then 5 - 8, 9 -12 the fruit cages & Air Walking Onions then the Daleks and Comfrey Beds.

Monday, 1 May 2017

Planning and Reviewing May in Previous Years

Reviewing the diary over the last four years for May

2013 - Spring was the coldest for 50 years, I had the first six beds and the comfrey bed in place. Beds 5 & 6 were Sprouts and Cabbages, as expected lots of sowing and potting on happened.
 
2014Frost warnings and seedlings grown in the grow house inside the green house on Mill Green. Potato Halums were a little frost damaged, Slabs at home laid for the Space Saver Greenhouse, Erected the Space Saver Greenhouse at home and the Double grow House at Mill Green.        

2015 -  Potatoes in Buckets, transplanting Tomato plants, High Winds and damage on the plots, Cherry Trees have Cherries on them, Planting out Spring Onions, Harvesting Over wintered spring onions, Planting Cabbages and Cauliflowers and the Crimson Crush plants arrive, three more bed frames made 

2016 - Spencer Road - Second sowing of sweetcorn due to slow germination then the first sowing germinated after the first !, Beds 1-3 completed, Potatoes in bed 3. Comfrey bed 2 completed.

Mill Green - overwintered onions in greenhouse planted to replace those that were nobbled by slugs in the beds, Sowing frenzy of beetroots, Spring Onions, Cucumber, Celery, second sowing or brassica's as first sowing died. Frost second week of May. Bean frame maintenance.   

As one expects there are items that are common to the month, it's interesting looking back at the work on my first plot and comparing that with the second. Most certainly having a plot to deal with has meant that the progress on the second plot has not been so swift.

Below is the to do list in no particular order and catching up with what actually happened in April and what has slipped

Spencer Road
  • As much infrastructure works as the weather will allow - Ongoing
  • Raise the paving for the greenhouse- Ongoing
  • Erect the greenhouse - Still waiting for the base to be completed
  • Weed the area and create Bed 8 for Spring Onions - Done
  • Make Walking Onion raised bed frames.- Still One to complete
  • Make a decision about if to have permanent beds behind the fruit cages - Yes Behind  
  • Dig up Rhubarb from Maggie's plot - Done
  • Sow Potatoes - Half done one additional bed to go in
Mill Green
  • Tidy Up the Allotment - Ongoing
  • Clear The Greenhouse - Done
  • Hoop Cages and Netting for Onions from Mill Green to Spencer Road - Not Yet but blue pipe obtained .
  • Drain and Move Nettle Water Butt to Spencer Road - Done
  • Install hoop eyes and training wires for trees - TBD
  • Prepare Cauliflower Beds - Done
  • Warm Up Carrot Bed - Done
  • Trim the grapevine Back - Way overdue
  • Sow Potatoes in Buckets - Delayed due to weather
  • Sow Potatoes in the ground - 2 and a hlf beds to be sown
  • Bean Frame to be fixed back to the Wall - Built new gallows brackets to be erected 
Home
  • Clear the crap out of the sheds - Started one done
  • Sow all the seeds Listed Here
Reminders
  • Already stocked up with coir for 2017, but I will need to replenish for 2018 - Started
  • Purchase vent opener for new greenhouse.- Not Yet 

Shelf Fitting, Weeding & Laying Slabs

I was on the Spencer Road allotment plot 23B early this morning at about 7:30, to miss the rain that was due and arrived between 10 and 11, and to get a few hours in before the rest of the household woke up. I took the shelf and fixed the supports on the sides of the extension to the shed. I trimmed about 4mm off the width of the shelf unit to give a little tolerance as the sides are not totally parallel or a hundred percent vertical. I forgot to take the hinges, so hinges and toggle to hold the shelf when in the up position will need to be fitted on the next visit.

Still didn't get around to planting the next bed of spuds as the weeds had started to take over the Japanese Onion bed and they needed to come out as the onions don't need any competition. The other onion bed that has the Coco compost mix on has hardly any weeds, so perhaps I should mulch around the Japanese onions?

Not enough time let to get into any serious digging done, so I decided to start re arranging the paving slabs where the greenhouse is destined to go. the 300mm wide strip will now go on the boundary with my neighbours plot allowing about 700mm between the extension to the shed and the side of the greenhouse when erected.

Saturday, 29 April 2017

Another Dalek Joins The Ranks

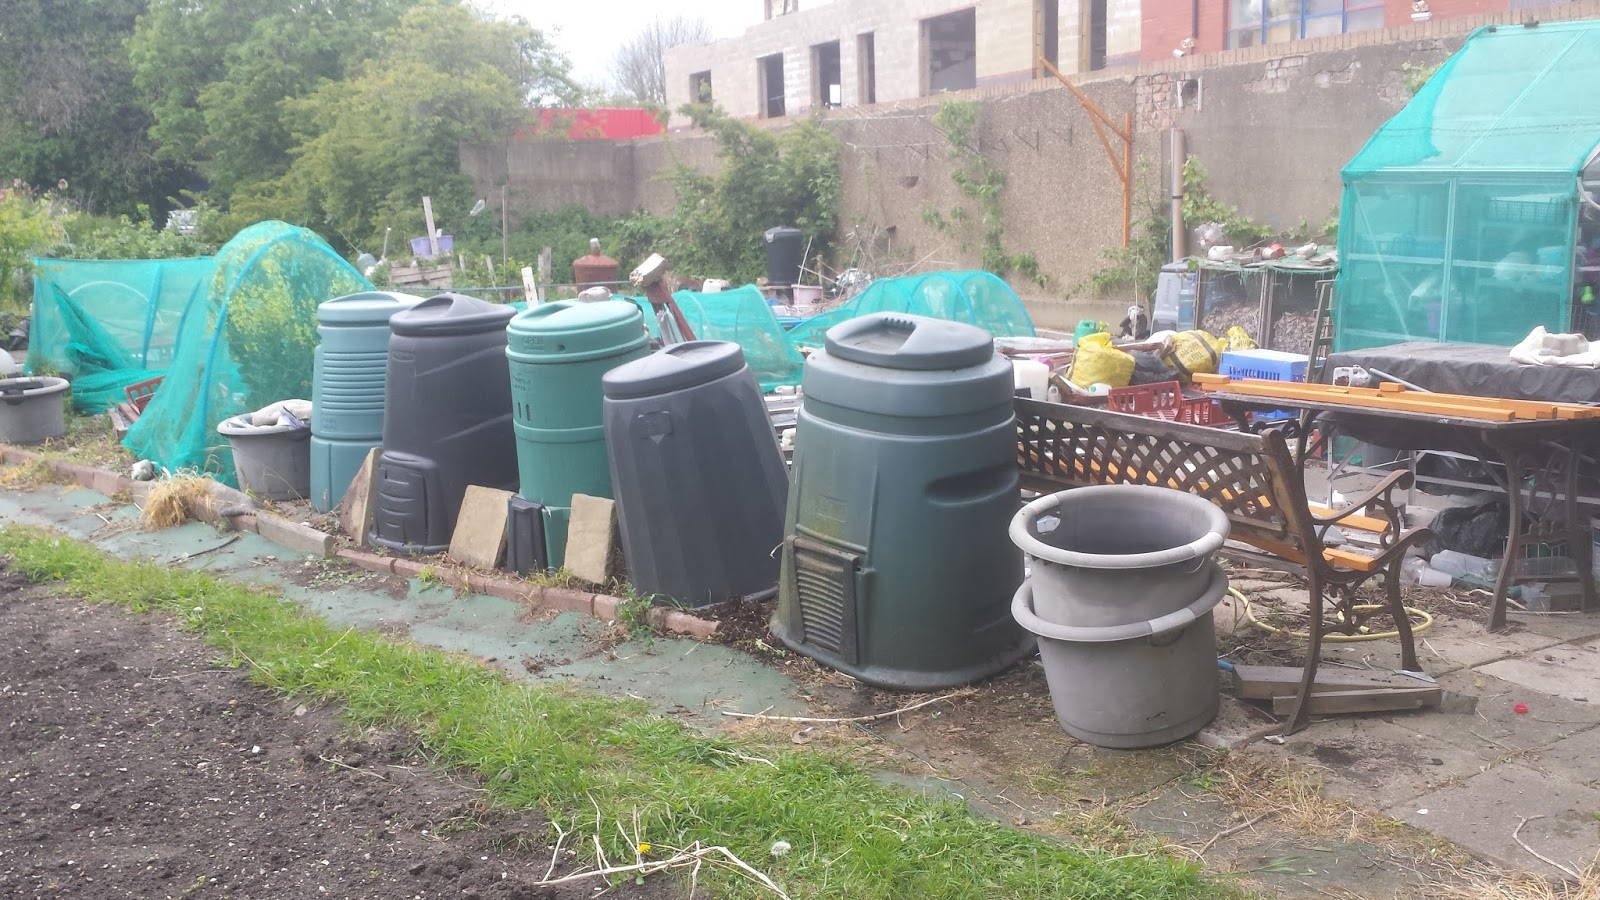
You do meet the nicest people on Freecycle, I picked up the nice oval wide Dalek at the end of the line on the right this afternoon from Sue in Chipstead and dropped it down to my Mill Green allotment.

The large sack that I could just about lift of grass was hot to the touch and steaming as I used it to fill the new Dalek up to the top of it's little hatch with alternating layers of shredded paper and comfrey as an activator.

The paper supply on the plot is now exhausted, so look's like I need to do a little more clearing out in the office at home to produce more brown material.

Thursday, 27 April 2017

Free Stuff


I always keep an eye on Freecycle especially for paving slabs and kerb edgings, this little photo popped up with the following note

"We have 9 concrete blocks used for garden borders available if anyone
wants to pick them up. They just need a bit of a scrub to get the moss
off them, but they're definitely re-useable. We are redoing our garden
and no longer need them."


I sent my request to give them a new home on my allotment and Neil emailed back letting me know that I could have them and that they were stacked in his front garden. They were retrieved this morning and taken to my Spencer Road plot and laid out along the boundary with my neighbour as there is a difference in height between our plots and it will tidy it up and nicely define the boundary between the plots.

My brother-in-law dropped off two giant woven sacks of grass cuttings last night and these were taken to my Mill Green plot as I had room in one of my the compost bins there, I have not emptied three of the five.

My sister also has a number of sacks of grass for me to collect and convert into compost so I decided I need another couple of compost bins, one on each plot.

I saw on Freecycle that someone was making a Dalek homeless and I am a sucker for Daleks especially when its a shape and size I don't already have so I offered to take it in and care for it and I've just been informed that I can rehome it.

I'm just waiting for an email with the address where to collect it from.

The assembled shelf for the extension to the shed has been screwed together and today had another coat of Red Cedar wood preservative and was basking in the sun this morning until the clouds came over and it started to rain so It had to be put under cover.

I also cut the shelf bearing blocks which will be screwed to the side panels. These again are timber from the wood store, which was salvaged from the contractors rubbish pile during the recent wet room conversion. The hinges cost me a 99p and oddly enough came from the local 99p shop. 

Wednesday, 26 April 2017

What Is Comfrey?

Here are a few notes based on my own research and use of comfrey since 2013.

Comfrey has long been recognized by both organic gardeners and herbalists for its great usefulness and versatility; of particular interest is the "Bocking 14" cultivar of Russian Comfrey.

This strain was developed during the 1950s by Lawrence D Hills, and was my preferred type as it is sterile and can only be grown from root cuttings so it's not going to take over your plot from seeds spreading.

There are various ways in which comfrey can be used as a fertilizer. These include:

Compost Activator
Liquid fertilizer
Mulch or side dressing
Companion plant for trees and other perennials.
Production of potting mixture

Location of the Comfrey Bed

 A comfrey bed is basically a permanent feature with a lifespan in excess of 20 years on your plot or in your garden so getting the site right is fairly critical. Once established, killing off comfrey is very difficult unless you resort to chemicals.

On Mill Green allotment I made a comfrey bed in the corner of my plot under the shade of a tree, in an area where there were tree roots and it was not particularly useful for anything else really. 

On Spencer Road I decided straight off the back to place two comfrey beds behind the Daleks at the back of my plot where it abuts the path in a compost making area to save the effort in transporting the cut comfrey to where it will be used. That's why the comfrey pipe and the comfrey water butt are all in the same area.

Harvesting Comfrey

In the first year (second for autumn planted) allow the plants to grow to the point where it throws up flower stalks and then cut back to about 150 mm (6″) from the ground.

Mature comfrey plants can be harvested up to four or five times a year, in the photo above which is comfrey in its second year, there is only 29 days between the two photographs. They are ready for cutting when about 600 mm (24 in) high, and, depending on seasonal conditions, this is usually in mid-Spring. Comfrey will rapidly regrow, and will be ready for further cutting about 5 weeks later.

Comfrey leaves have small prickly hairs on the leaves and stems that can cause skin irritation, so its worth wearing gloves and something with long sleeves when handling it. Because of these hairs I have found it sticks like manure to a blanket on your gardening gloves, so when I'm filling the comfrey pipe I use rubber gloves.

The best time to cut comfrey is shortly before flowering, for this is when it is at its most potent in terms of the nutrients that it offers, I use the coming of flowers as a cue to harvest. Comfrey can continue growing into mid-autumn, but it is not advisable to continue taking cuttings after early autumn in order to allow the plants to build up winter reserves.


Making Comfrey Tea

As mentioned above, it can be used in various ways, however a few thing to bear in mind the first of which is depending on how you produce your comfrey tea the liquid can stink like raw sewage as the comfrey decomposes. If you don't cover it up it attracts fly's as they think it is actually sewage.

Here is a link to Gardeners World site on how to make tea using a bucket with a lid and a weight, add water wait between 2 - 5 weeks, strain into a container, dilute with water to a weak tea looking colour. This was the first way I tried making my comfrey tea & feed, its very messy and smelly to do this way.

I then saw a post where it was suggested that you chopped up leaves and put in the milk bottle added water and waited for it to turn weak tea colour, but this took ages and then you had to dispose of the bottle once used or re fill and it was a real faff and didn't really work on an allotment level.  

Finally I saw and got recommendations from other allotment holders on forums about the comfrey pipe see previous post. No real smell when compared with the bucket & lid method, produces concentrated comfrey that I add to a water barrel so I have weak looking comfrey tea on tap.

I use a PowerBee Perfect Solar Power Pond Oxygenator in the barrel which I have found neutralises the smell, and obviously being solar powered cost me nothing to run.  

I hope you found this information useful, and if you have any more questions about comfrey or the pipe, please use the comment link below.

LINKS

After writing this post I found links on a chat on UK Here We Grow Facebook group to Permaculture News - Comfrey Believe The Hype and  Does Comfrey Really Improve Soil ? both are excellent articles and are very informative about Comfrey, Thanks to Myles Adams for posting the links.

Tuesday, 25 April 2017

Grand Erections - Comfrey Pipe

Sorry if you found this post by the first part of the title in Google, but it's about gardening porn.


The comfrey is growing at an alarming rate and now I have onions in the ground that will need feeding, and the grass cuttings are starting to flow from all directions for composting, I really needed to erect the comfrey pipe. You may recall that in true Blue Peter fashion I made the end cap, bottle holder and weight last month.

So with my daughter working nights and being around this morning to keep an eye on the wife, I nipped into the allotment at about 7:15 this morning and used the auger to drill a hole next to the walking onion bed and positioned the 75mmx75mm fence post. 

Next I screwed the two side cheeks of the milk bottle holder and then the top plate with the slot for the silicon nozzle and end cap. I used two small steel angles to fix the side cheeks to the scaffolding board of the raised bed to offer a little more lateral restraint against wind, as this one is free standing and not fixed to the wall like my comfrey pipe on my Mill Green Allotment.

Two pipe fixings were screwed to the post, the cap tapped into place on the pipe and then the pipe offered up to the brackets and they were locked in place. 

All that remained was to cut up two square flower buckets of comfrey and fill the pipe to a level where the weight was visible but the bottom still supported by the pipe. A milk bottle was offered up so the nozzle was inside the milk bottle and a half brick slid under the bottle to keep it in place. 

A small amount of water was poured in the top of the pipe, and allowed to drip into the milk bottle, this was then poured over the walking onions, waste not want not. So now I have damp comfrey in full sunlight with a 2 litre bottle of sand under the influence of gravity compressing the comfrey. It will be interesting to see how long it takes before the weight starts to disappear into the top of the pipe and the black gold starts dripping into the milk bottle.


Photo of the two comfrey beds at the back of the allotment today

The same comfrey beds on the 26th March 2017  

Next job is to get the spare dustbin water butt over from my other plot so that I can have comfrey on draft.   

Monday, 24 April 2017

Shelf Fabrication & Corner Connectors

I'm a bit of a squirrel in nature and I tend to keep anything that may be useful one day stored away. In my wood store are some timber bed slats,  two have been ripped up to form the ties to screw the timber batten shelf together for the extension to the shed, and the another to form corner connectors.


In the photo above the shelf is upside down. It will provide a great place dry out the onions once they are harvested.

In hindsight I should have bought another couple of roofing battens home, I've placed a couple of off cuts in, to see what it would look like with two extra timbers, and it defiantly needs them to be practical for supporting small flower pots in addition to trays and onions.


The rectangular bed slats corner connectors are to be painted and pre drilled so they can be used to fix roofing batten together to make a front timber picture frame that debris netting can be added too which will keep the foxes from sticking their heads and paws in the extension when it's being used as a cold frame/ hardening off or onion drying area.

I will take them to the allotment once they are drilled and painted and I can assemble the picture frame and paint it on site. I have some offcuts of debris netting at the Mill Green plot and will rescue some to be stapled to the frame.

Note to self  ~ pick up two more battens on your next visit to the allotment, pick up a couple of hinges when you visit the £1 shop.

Sunday, 23 April 2017

Side Extension Continues

A swift Sunday morning visit to add some additional battens to the side panels at the top to fix the tri-wall polycarbonate sheet.

I'm going to make a frame up to fit into the front which will be held in place by a couple of toggle latches so a stop has been fixed to the inside of the side panels.

The two sacrificial feet were cut, sanded and all the timber and cuts was painted apart from the bottom tie, I did manage to paint the cut ends but I need to open another tin of red cedar shed and fence paint.

The bottom member has been positioned such that two double tray gravel trays can be slid under it.

As I was cook of the mess (when I cook it is a mess), and as my wife is still bed / first floor bound at the moment, my time on the plot in the morning was limited to getting the frame ready and painted so that it was dry for a second visit in the afternoon after lunch so that I could go back and fit the roof and the sacrificial feet.

As the shed has finally had a coat of paint I have fixed the plot numbers on the side of the shed.

I've bought the timber home to make the hinged shelving but it will not be needed quite yet as I have moved all of the cardboard that my brother-in-law had allowed me to store in his shed into the store as he is relocating his shed on Wednesday.

Saturday, 22 April 2017

Shed Extension & Gallows Brackets


There was an Allotment Committee Meeting this morning on Spencer Road Allotment, so whilst waiting for everyone to arrive I moved the slabs that were up against the shed and finished painting the side, then I started on the erection of the extension to the shed.

The side panels are currently hung off the side of the shed and there is a small gap under the bottom, as I don't want to be in direct contact with the floor, but I will be adding some roofing batten feet that can rot and be replaced as necessary. The battens at the top of the extension will support the tri-wall polycarbonate sheet that I have to form the roof to the it, and it was cut to size in the afternoon at home.

Re shelving I have a couple of options, I have enough batten to make a removable shelf for when it is being used as a hardening off cold frame. or I have a couple of blow away frames that I could stick in there.

The shelf or blow away frames will have to be able to come out as I may also use it for growing tomatoes in there. The other use for this extension is to stack the food buckets of paper, coffee grounds etc. that I use for composting.   

Maggie also reminded me that I had not taken any Rhubarb from her plot, I know she said I could help myself but I really wanted to do it when we were both on the site. So I now have five sections of Rhubarb sitting in square flower buckets awaiting the formation of a permanent bed at the end of the allotment behind the walking and Air Onion beds.    


Later in the afternoon I went to the Mill Green Allotment to drop off the gallows brackets, but could not help but assemble one bracket and temporary cable tie it to the hanging basket brackets to see what they will look like up on the wall.

They will definitely need to be tied back to the wall with some new fixings as whatever it was that fell through the original bamboo structure knackered the fixings when it did.

Me thinks the gallows brackets need to come down about a 300mm - 400mm so that I can reach the end of the top member off the small two step set of steps.  .

Thursday, 20 April 2017

Gallows Brackets Mass Production


If you can call 4 mass production ?

All parts to replace the cantilever frame on the second runner bean bed are now painted and assembled for transporting to the allotment for final assembly and erection, all the ends of the struts & joints are numbered. I will post a photograph when they finally make it up onto the wall at my Mill Green plot.

Best of all is that I acquired the timber roofing battens for free a few months ago, the screws and paint were in the shed so it's cost me nothing to build them, hopefully they will last longer than the bamboo version.

Wednesday, 19 April 2017

Runner Bean Gallows Bracket

My daughter was on a late shift 2pm - 11pm yesterday, which means that she does not get home until about 11:30 and as a result tends to spend some time in bed in the morning resting and chilling if she has not got anything planed. I checked with her that I would be OK to leave her to keep an eye on the wife until mid morning.  

My body clock woke me up about 5:55 as usual, so a swift shower and breakfast and I was on Spencer Road Allotment by 7:15 with a tin of red shed and fence paint and started painting the ply panels that I had taken down for the side extension to the shed.

Looking at the door to the shed, the timber is already shrinking as it's drying out and getting sun bleached, so I thought whilst I had the paint and brush in my hand and I was waiting for the first side of the panels to dry I would paint the shed.

Then the thought struck me, the timber post for the comfrey pipe need a coat before I install it, and it needs erecting soon and the comfrey is growing like mad, so that received a coat of paint too .

Hang on a minute, I'm going to fix it to the walking onion raised bed, so that too got a coat of paint, by which time I could paint the other side of the extension panels as the first side was dry thanks to the sun. I continue with painting the sides and rear of the shed, then another coat for the comfrey pipe post.


On leaving the plot to come home I sorted out twelve number 1.2m length of roofing batten to make the gallows brackets for plot 1A to replace the broken bamboo cantilever bracket


Broken Bamboo Cantilever Bracket


So here is the template that I have come up with, another four to cut, drill and then paint then they will be ready for taking down to Plot 1A on Sunday Morning to be fixed to the existing hanging basket brackets that are on the wall.

I may need to add some additional steel angles to fix the vertical timber to the wall at the top and bottom, I will have to see how well they cable tie to the hanging basket brackets first.