Sunday 28 February 2021

First SFG Bed Is In.


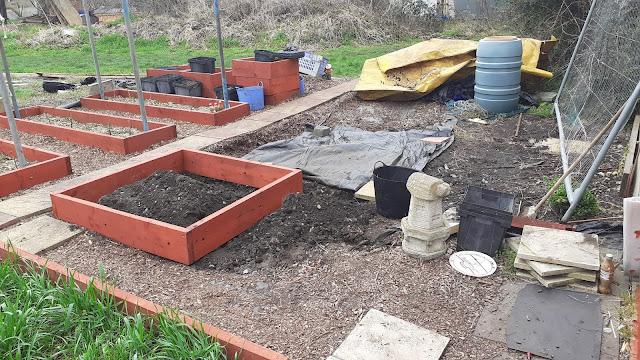
Another early arrival at the plot and I set to work pulling the tarp from under the herris fencing and removing the timber that was under it. 

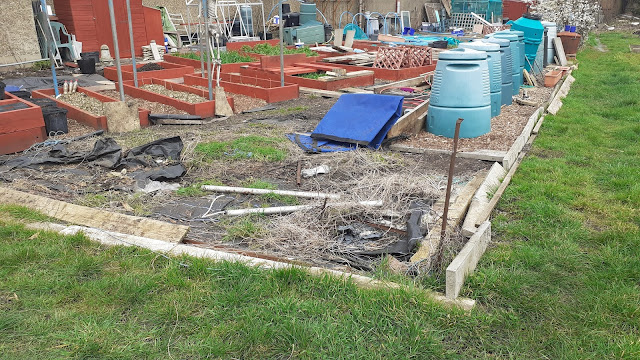
More woodchip was removed and the weed membrane cut to the line of the main path enabling the sheet to be folded back on itself. I had just started digging and weeding when John the fire king arrived and asked if I had anything that needed burning reminding me that we only have 15 days in which to have fires, and then it's no more fires until October. 


I had already been tidying the area in the South West corner of Plot 1, and extended the search for rotting timber that I had inherited when I took over the plot and surprisingly there were four wheelbarrow loads that John took and burnt for me during the morning. 


When you have trouble getting up and down on they knees its not easy assembling the beds on your own and holding the corners in place as you screw them together but I managed to assemble the bed and dug out a slot so that the left side could lay level.

I've left the soil in a mound in the middle of the bed so the fox can come and do his inspection and have a dig for some worms. Two robins one skinny and the other a little fat ball, have been around me most of the morning and I named them Laurel and Hardy. 

I came away from the allotment with four sacks of rubbish and have negotiated with my sister to occupy half of her brown wheelie bin for the next collection. I'm hopeful that there will be ample dry days in March that I can get the SFG Beds, the Rhubarb beds and the Solar Tunnel and greenhouse installed by April.

Saturday 27 February 2021

Laying Paving Slabs


Plot Security is no longer sitting on the job he is now on patrol in the Raspberry beds!

Another early start after clearing the windscreen of frost. I arrived at the car park at 7:50 and started to clear the area on the right of the path, which included removing the timber boards and uncovering the Battenberg paving slabs which had been covered in woodchip. 

As the slabs were uncovered the woodchips were stored in flower buckets that are standing in the end empty Raspberry bed. 


The Ketta store was brought up by the comfrey butts, it needs some TLC but will be idea for storage of compost and other bagged material as the foxes love to get into everything if you leave it out in the open. 


I found the elusive raised bed bracket that I won from the Grow Your Own Grapevine forum for being a member of the month, that I have been keeping for the new greenhouse. On that basis I gave the timbers that I have previously prepared another coat of paint. 


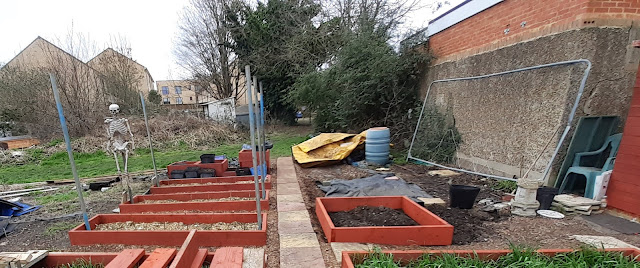
View into the Square Foot Gardening and Solar Dome area of the plot. The yellow tarp is holding water and many bees and wasps are using it for a drink. The plan is to remove the water and the tarp early in the morning before the bees and wasps are up and about, and to get on with digging and weeding the Square Foot Gardening Beds.

Friday 26 February 2021

Scaffold Poles in The Raspberry Beds


I arrived at the allotment at 7:30 after clearing the ice off the windscreen, it was 9C when I went to bed at around 11pm I was not expecting frost and I had not covered the chitting spuds in the Space Saver Greenhouse. Note to self check those little dudes out!

There was a mist over the plot and a file on one of the plot was still smouldering and the smoke was hitting the mist and with the sun coming up over the buildings on the boundary it looked just like a graveyard scene from an old horror movie.

Frost was on everything including the green manure. It looks as if the plot fox is now bedding down of an evening on this bed looking at the recess that has been getting more consolidated over the last week.


Painting and doing anything to the cut timbers for the beds was out of the question until the sun had thawed them, so I started off by doing a little more digging of the square foot garden bed.

As I started working my way back I looked at the materials stored in this corner and thought, I may as well clear some of this out of the way, so the long timbers were moved to behind the Dalek army and the scaffold poles that were under the yellow tarp were moved out which distracted me from digging and weeding.

I had noticed a few visits ago that some weeds were starting to grow in the raspberry beds and now I had scaffold pole out and exposed I popped to the car and got my Ryobi drill and long Power Planter Auger and set about drilling some 600mm deep holes in the ends of the beds and installing the scaffold tube standards. (A standard is the term for a vertical tube)

The 600mm x 600mm Rhubarb beds were relocated on the 4th Raspberry beds, which as yet don't have any Raspberry plants in and holes in the ground, sorta 75mm diameter and round were drilled or angered out using the Power Planter and Ryobi Drill


I have to say that I love the Power Planter range of Augers. The one in the photo is the 3"x 24 Extended length Bulb & Bedding Plant Auger

I'm going to move the bulbs in the green to along the path between plot 1 and Plot 2 and the smaller Power Planter bits like the 207 and 307 Models are ideal for that. I also have to form a trench from the corner of the plot to the tap and water butt which I will use the Power Planter 312 deep cultivating bit for.

I weeded the Raspberry beds and then made a couple of trips to the wood chip heap in the drop off and pick up area and cover the beds in about 25mm of the the pine woodchip mulch.

I was going to move the paving slabs that have been stacked wither side of the shed door, but they are 400mm square and not 450mm like the rest of the slabs on the main path on plot 1. There were two 600mm square slabs that I have placed at the corner of the shed that infill that area a little too well and I need to move the slabs under the extension to the shed about 5mm for a perfect fit.

The slabs need some levelling bit it looks as if I will use them for a small paved area in front of the shed and as a secondary link to the main path to the allotment entrance. Bottom line is I need to keep an eye out on freecycle for some more 450mm or 600mm slabs so that I can have a paved path from the entrance. I may have to steal some slabs from secondary paths on plot 1A to achieve that faster and then replace.

Wednesday 24 February 2021

Clean Up and SFG Beds


A swift visit this afternoon between 2pm and 4pm. With the dustmen coming tomorrow and only one box of plastic, metal and glass full, I decided to cut up all the pop bottles that were in the plastic laundry basket which were left over from when I built the pop bottle greenhouse and I started to tidy up the potting bench area and patio in front of the entrance to the greenhouse on plot 1     


The bluebells are growing at a rate now and it will not be long until the comfrey starts showing  their heads out of the ground as well. Only one daff at the moment.


View from the top entrance into the patio area. 


As I took the photo of Plot 1A, I noticed that there was blossom on the plum tree! There was no sign of blossom on Sunday when I was on the plot. It shows what an increase in temperature of about 12 degrees C over a couple of weeks will do. 


Plum Tree In Blossom 


Battenberg paving slabs were moved from the old path leading from the entrance to the shed on plot 1 to behind the greenhouse linking the paths either side together.  


The windmill was moved back to the shed and digging and weeding of the the first square foot gardening bed started about half an hour before I went home.  


Weed membrane pulled back, digging and weeding started on SFG Bed 1 view looking up the plot.

Tuesday 23 February 2021

Self Watering Pop Bottle Propagator

Video made in 2016 and I've been using these annually, they are so useful. 

Monday 22 February 2021

Infrastructure Continues


Todays morning visit, all timber cut for beds so far were given another coat of paint, some smaller lengths were given their first coat and two more 600x600mm Rhubarb beds were made up and given a final coat on the external face. 

With a little luck I will have the area where they are going dug and weeded and the beds installed before the Rhubarb plants arrive.

Rhubarb Livingstone Plant - D.T.Brown 

World's First Autumn Cropping Rhubarb

Plant in full sun DTB Disease Resistance        

Botanical Name: Rheum rhabarbarum
Pack quantity: 3x 9cm potted plants
Item code: 50310
Despatch: From 18th May 2021
. 


There is an additional 600x600mm bed that I will be using as a nursery bed for growing and harvesting my own parsnip seed in 2022 

Sunday 21 February 2021

More Bed Timbers


View up the plot from the main path at the end of the mornings work.


Morning spent panting and cutting timbers for the Rhubarb 600mm x 600mm beds. Screwed the first bed together about 10:30  


Timbers basking and drying out in the sun that decided to show itself about half an hour before I went home for Sunday lunch. So next visit painting and the pilot holes in the timber that is adequately covered in coats of paint. Then digging and weeding the first Square Foot Gardening Bed.

Saturday 20 February 2021

Painting Bed Timbers


After many wet days finally a dry morning and I was on the plot by 8:30. I enjoyed the solitude until about 10:30 when the first of many plot holders started to roll in. 

Andys padlock has ceased up and he could not get into his shed despite the small tin of WD40 I lent him. He will have not option other than to angle grind the lock or break off the hasp & staple. He is returning in the morning with some tools!

Once again I'm underwhelmed with the Ronseal one coat (my arse) shed and fence paint, yes I know it's water based but No it does not do what it says on the tin. As I'm applying it, I'm asking myself why am I bothering and noticing how the year old beds have weathered. I foolishly bought quite a lot of tins when it was on offer and may as well use them, some protection is better than nothing. 

All the timbers were laying flat and the wind was such that a few were blown over when standing on edge to dry. By midday I had two sets of SFG bed timbers painted and two sets of Rhubarb bed timbers cut and painted with their first coat.  

The main job next visit will be to drill the pilot holes and to give all the timbers another coat of paint.  Hopefully I can at least dig out and weed the first Square Foot Gardening beds in the next 7 - 10 days. With no work because of lockdown and waiting for the vaccine to get in my system and then waiting for the second dose, I'm hoping leg willing to get down here and crack on with the infrastructure.     

Thursday 18 February 2021

Frost Protection Reduced


With the night time temperatures staying above freezing and anticipated to be a min of 4C plus it stopped raining for a while I made a dash for the space saver greenhouse and removed the bubble wrap and fleece so that daylight can get to the chitting spuds. 

I also took the opportunity to cut more timber to make shelves for the bottom layer of trays so that I can use the watering trays with my modules.

Wednesday 17 February 2021

Saturday 13 February 2021

SFG & Rhubarb Bed Timbers


At the suggestion of Kelly I popped down to the allotment for a couple of hours to have a potter about. The temperature was 1C and some snow is still hanging on and buckets and containers are full and iced over still. 


All of the timbers that I had stacked up on the bed frames to dry had fallen over, either blown by the storm or knocked over by a fox or cat and like dominoes were all laying down. The snow has been melting but a few timbers are still covered in snow/ice with icicles hanging off. 


Each timber was looked at, the screws and nail removed and then stacked on the bed frames of the beds with green manure growing on them. Iced face towards where the sun will be tomorrow morning. 


There are three stubborn screws to still come out and a joist hanger with trimmers to be removed from the timber on the far left and two more joists to be cut and cleared of any nails then they can be drilled and painted ready for assembly when the box of 80mm timber long screws arrive.


The shorter timbers that are to be cut to 700mm long to make the 600x600mm Rhubarb beds were also staked facing the sun to dry off.


The daffs and tulips don't appear to have been hit very hard by the snow and once the temperatures increase a little I will be moving them in the green along the edge of the path between plot 1 and plot 2.

Friday 12 February 2021

End of the Beast from the East II


Last night I took the wife and I to get our Covid-19 Vaccinations at Epsom Downs Racecourse, we had an arrival time of 4:50 and it was -2 degrees C at home when we left but -2.5 degrees C on Epsom Downs when we arrived.  

Temperatures of -3.2C and -2.5C were recorded in the Space Saver Greenhouse over night and the sensors under the protection to the spuds recorded -0.9C and -0.5C. There was no hard frost on the car windscreens this morning so I'm hoping the spuds are OK.

As I write this and with the sun warming up the greenhouse it's between 6.7C - 7.7C in the greenhouse but tonight is going to be -5C and the Firefly will defiantly have to be employed to help stop any frost damage to the spuds. 

From the weather forecast it looks like degree of protection can be reduced from Monday 15th Feb as I'm using 4degrees as my minimum for fleece and bubble wrap. 

It appears that if the wives mobility stays stable I may be able to get down on the allotment and play catch up a little on the jobs I have not done and get the square foot gardening beds and the greenhouse in before the end of March if the rain holds off.    

Tuesday 9 February 2021

ORIA Digital Thermometer Hygrometer

As you guys know I love a gadget and my latest arrived last night and I unpacked it and set it up this morning, it's an ORIA Digital Thermometer Hygrometer [Upgraded] with 3 Wireless Sensors, Touch Screen Backlit, Indoor/Outdoor Humidity Temperature Meter Monitor, 100m Range, °C/°F, 10s Auto Refresh for Home, Greenhouse.

Cost me £26.09 from Amazon use hyperlink https://amzn.to/3juXSP4

I used my Brother P-Touch labeller to number the bases which Channel I had set the Sensor too

I like this set up as unlike my previous one I don't have to plug it into the mains and having set it up the communication with the sensors has not dropped and the display rotates through the three channels plus the display is very visible during the day and there is a backlight button on the touchscreen icons along the bottom.


During the summer the sensors will go in each shelf or tray level at the moment I have Sensors 1 & 2 under the propagators on the top and second shelf, which are then covered in bubble wrap and fleece in the greenhouse.


Sensor 3 is out in front of the mushroom trays in the second shelf in the Space Saver Greenhouse.