Wednesday 31 March 2021
Hydrating Coco Peat or Coir Blocks
Tuesday 30 March 2021
Coir Dustbin
The coir blocks I have from the Pound Shop need 3 litres of warm/hot water per block to rehydrate them to 10 litres of coir and I only have a small 1 litre kettle and gas ring on the plot so have decided to re hydrate them at home and then take them to the plot.
I will need somewhere to store the coir on the allotment before I use it mixed with the compost for my potatoes in buckets.
So following a little desk study/ surf on the internet, I decided on buying a Wicks Heavy Duty Black Dustbin 90L
Diameter 480mm, Height 700mm, made of Black Polypropylene, Lid Locking and Cost £14
Heavy-duty reinforced base and easy-lift lid.
The coir blocks are in plastic bags, and I put one block in each of four square flower buckets and boiled 12 litres of water and ended up with 40 litres of Coir to take to the allotment.
I placed two paving blocks on each bucket, loaded them in the car and took them to the allotment together with the additional three 40L Wicks general purpose compost for £12 that I also bought this morning.
On arriving at the plot it was nice to see that idverde had cut the grass on the main path and from the looks of it made a great job of it. 24C and Sunny. I placed the Bin near to the shed and the paving blocks went to the next bed that needed them.
I thought I would take a quick whizz around the plot 1 greenhouse now it clear of all the bags of rubbish again.
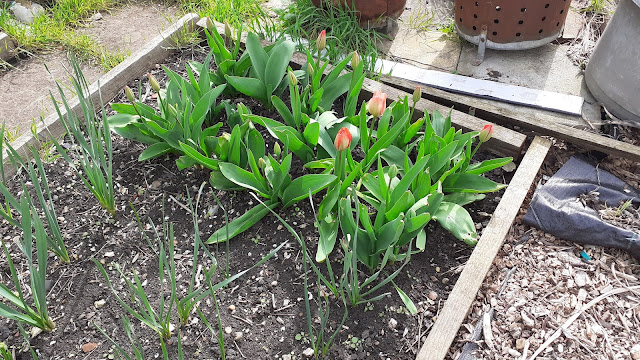
The tulips are really enjoying the late March sun and warm temperatures
Monday 29 March 2021
Plot Clearance Plus
Up at the crack of dawn and down on the allotment around 7:30 . I took 6 paving blocks per flower bucket with me and placed 6 around 3 beds for holding the weed and planting membrane in place.
All the blow-a-way frames and miscellaneous debris I had inherited and stacked on the edges of the plot is now gone!
Emma Wooldridge and her ruggedly handsome father working on the plot.
All work undertaken whilst social distancing.
The post with and the post behind the owl to be driven another day.
The compost coir mix from 2020's tomatoes grown at home used as a soil conditioner on the bed that was covered with the timber joist a few days ago.
Emma discovered how much work is involved removing mares tail from the plot whilst digging and weeding Square Foot Garden Bed 2.
Sunday 28 March 2021
Hose Trenching & Bed Frame Cutting
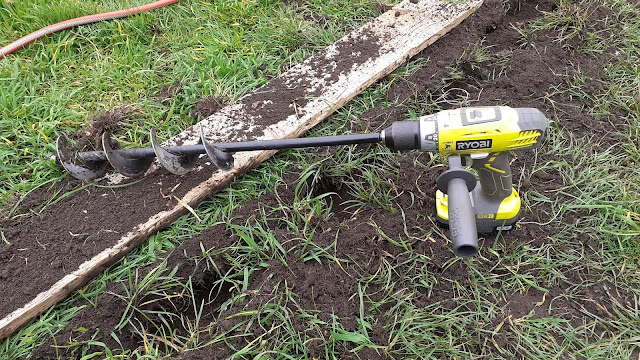
I used the two foot long 3" diameter power planter to drill a number of holes in the ground from the corner of the water tank and tap cutting across the main path at an angle to the corner of my plot.
I fixed the hose and then cable tied the hose to the pipe supplying the water to the tank and tap so that when it's unattached it will not flop down and get lost in the long grass that grows around the tank . The trench was cleaned out . bottomed out with a trowel and the hose dropped inside the trench.
The hose was pressurised so that it didn't get squashed during the backfilling process and gradually the hose was buried in the bottom of the 75mm shallow trench.
My trusty Ryobi drill and 75mm (3") by 600mm or 2 foot long Power Planter auger which made light work of doing this and saved me having to bed down or get down using the shorter bit that I also have. If you ever get a Power Planter make sure you have a drill with the stabilising handle.
The soil was brushed back into the trench and then I used the hose to wash the remainder of the excavated soil back into the trench. The water will assist in reconsolidating the soil around the hose, which was still pressurised. I will scatter some grass seed and some compost over the trench to heal the scar I have made in the main path and within a few months no one will know the hose is there.
Tulips giving a flash of colour and a source of pollen for the bees that are now awake and out and about. Many of the daffs have come up blind and I have no idea why?
I moved the painted timbers for SFG Bed 2 and placed on SFG Bed 1 and then proceeded to cut the timbers for SFG Bed 3. There are nail plates that need removing and the timbers need de nailing and then painting but at least they are now cut to size. The timbers stacked at the rear left are for the solar tunnel/ Superdome bed.
Yep one timber is deeper than the rest but I will just loose that in the ground when I assemble and install. The timber stacked up to the side of SFG Bed 1 is mainly scaffold boards and are thus 38mm and not 50mm thick but will do for small beds in the corner of the plot.
Malling Juno (early) Raspberries from D.T. Brown showing signs of growth and life.
View looking down plot 1 the timber that was over the beds on the left has now been sorted into those required for the solar tent bed which will be 3.2m the length of my longest timbers x 0.9m. Its amazing how much growth the green manure has made in the last week. I really need to cut and drop within the next 7 - 10 days before it goes to seed.
It's nice seeing the vision in my mind gradually becoming a reality. many bees and wasps drinking from the water held by the yellow tarps as it was quite warm on the plot today.
Saturday 27 March 2021
Greenhouse Plot 1A
I ended up cutting these bottles down and staking them in each other just to reduce the volume and in the end managed to get them all in the cardboard box on the handle bars of the wheel barrow. I bagged up many other items of detritus ready for Monday and spent all morning on the plot.
Friday 26 March 2021
My Awesome Daughters
My daughters have been gathering all the debris primarily biodegradable milk bottles and other rubbish and helping me tidy up the allotment.
I've been antibiotics for cellulitis that has flared up in my leg and foot and my stomach decided that it wanted to play up which meant not going too far away from a loo, so Emma tidied up the Potting area around the greenhouse on plot 1A on her own and sent me photos when she was not sure what was and was not rubbish.
The potting area without the grape vine and bind weed and all the detritus bagged up and placed in the greenhouse in sacks ready for taking to the tip on Monday.
Kelly helped me clear up the back garden in the afternoon and we have placed all the bags of rubbish in the utility shed ready for the tip run on Monday. I have to say I'm really blessed with two awesome Daughters who have lifted my spirits so much and have made me feel like I have the possibility of getting the plot ready for the 2021 summer growing season. They are both truly inspirational.
Thursday 25 March 2021
New Miracle-Gro Compost
Following the Gardening Press event the nice people from Miracle-Gro have sent me 5 sacks of their new Miracle-Gro Peat Free Premium Fruit & Vegetable Compost to trial.
Why so many sacks of compost you may ask, well I was discussing the square foot gardening beds and the experiments I wanted to try this year and they saw how much compost I would need for the beds and have sent me ample for that and to also to trial on other growing projects.
This new product is part of the high-performing Miracle-Gro peat-free range. With its unique 3-part patented formulation, this peat-free compost caters for the needs of fruit and veg plants and will feed for 3 months. This unique compost provides the optimum structure for roots to grow strong and controls water availability according to their needs.
How to use
Use as special compost for containers: Cut the top of your Miracle-Gro Peat Free Premium Fruit & Vegetable Compost and use as a special compost for your fruit and vegetables in containers. Place a layer of compost in the base of the pot. Tap out the plant from the old pot, loosen the root ball and place in the centre of the pot. Fill the space around the root ball, ensuring the compost level covers all the roots. Firm lightly, water thoroughly and let drain.
Use as a regular planter: Cut three panels from the back of your Miracle-Gro Peat Free Premium Fruit & Vegetable Compost and use as a planter for tomatoes, strawberries and courgettes, etc. Place in a sunny frost-free position. Shake bag to distribute contents evenly. Cut out three panels on the back of the planter where shown.
Use as an extra deep planter: Cut down the side of your Miracle-Gro Peat Free Premium Fruit & Vegetable Compost and use as a deep planter for root vegetables such as potatoes and carrots. Place in a sunny frost-free position. Shake bag to distribute contents evenly. Cut along the side of the bag, following the indicated lines. Plant potatoes in the bottom of the bag or plant seedlings. Water thoroughly after planting.
Where to use
Ideal for fruits and vegetables.
Works well for young plants and established plants.
Perfect to plant directly in the bag or used as special compost for fruits and vegetables.
Coverage
- Fills 8 medium pots 22cm (9").
- Fills 4 large pots 25cm (10").
- Fills 1 large container 42cm (17").
- Fills 4 hanging baskets 30cm (12").
Cautions
Use in a well ventilated place and avoid breathing in dust.
Always wear gloves when gardening. Wash hands after use.
Store in a cool place, away from sun.
Open bag carefully and reseal after use.
Always read the label and product information before use.
Where to Buy
Use this link to enter your post code and find local stockist of Miracle Grow products
Wednesday 24 March 2021
Padlock Problems
I get a phone call from our Bee lady at the allotment that Nigel (name changed to protect the innocent) has broken his key in the padlock and that they are locked inside and didn't know what to do, so phoning the site rep (me) was their answer. I phone the maintenance company idverde who I find out finish at 4pm.
Sunday 21 March 2021
Polka Raspberry Canes Arrive
The missing Polka Raspberries from D.T.Brown were shipped and arrived Saturday


