So here is a series of photos I took when unboxing the Greenhouse Sensations Quadgrow & the Water Butt Extension Kit. I've included the drawing above so that you can identify the names of the parts that make up a Quadgrow
View into the box on opening
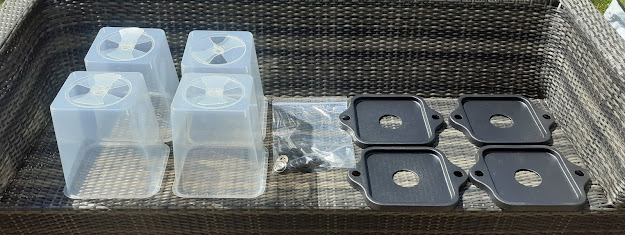
I emptied the box and laid out the parts on the garden bench
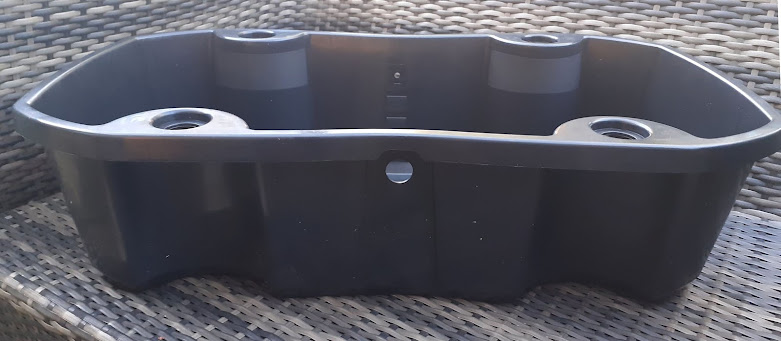
The Capacity of the Quadgrow is 30 Litres which is 15 Litres per Smart Reservoir,
I originally thought that the marks on the inside of the Smart Reservoir below the weep hole were some form of measurement perhaps for the dipstick but I asked Greenhouse Sensations and it appears "they are marks left from the injection moulding tool when they are
ejected".
As I stated in my first posting about the Quadgrow it could really do with a water level indicator rather than the timber dipstick
On the outside there is a line just below the overflow hole and the word Max, unfortunately when I set my units up the overflow was facing the wall. When I set up in the greenhouse I will make sure I have the overflow facing the front where I can see it.
The 21mm diameter hole in the middle of long face of the Smart Reservoir is for the optional Water Butt Kit if you are not using one these holes can be sealed using the two black grommets supplied.
What I liked straight away was the quality of the Pots and the decorative feature pattern around the top.
Having seen the Quadgrow at the Gardening Press Event I knew what most of the parts were in the zippy bag with the exception of the long timber sugar spoon, which on inspection of the Schedule of contents on the front page of the instructions turned out to be a Dipstick
At the time of receiving the Quadgrow the intention was to connect the two Smart Reservoirs together with the Tank Connector the washers and the Root Filters using the Spanner provided in the kit, however It transpired because of Covid-19 that I would end up using the two halves separately so that I could move them around a little as I had some work to do on the rear patio door.
To enable this separation two 25mm rubber grommets were required. These unfortunately are not supplied like the two 21mm ones are for the Water Butt holes are. I purchased a pack of six 25mm rubber grommets for £2.36 including postage and packaging from eBay.
I set up the two units with the Tank Connector to take this photo and they were transferred into a portable greenhouse until we had high winds and the greenhouse wanted to become a kite.
This I ended up setting them up independently and decided that getting the Mulch Cap and Cane Support Kits and the Protective Lids or Propagators would be a good idea so these came in a separate package
Don't do what I did and try and put the cane grommet in the Feeder Tray one set go in the Mulch Caps and the other in the recess in the Smart Reservoir
This was the first half I set up and put the canes in place.
I only had time to fill and plant one tomato in the second half of the Quadgrow.
I was running out of daylight as I got to the forth pot, and was not sure which plant to pot on, so I topped the pot up to the brim and the underside of the mulching cap with compost. I used an empty flower pot the same size as the one the tomatoes were being transplanted from to make/ form a hole the right shape and depth in the larger Quadgrow pot for potting up the following day.
Here is an example of what I'm trying to explain above in the Elho Self Watering Pot
Nice healthy tomato plants in the Quadgrow
If you are reading this post on a Windows 10 Computer if you click on an image you should get all the images full screen to look at.
The Small Print. I have not been paid to write this review, I'm not on commission, trial equipment was provided to me in order to review.


Great article Alan! Thanks for taking the time to share your experience with your audience :)
ReplyDeleteYou are welcome, its a great product and I can't wait to get it set up in my new allotment greenhouse next year
ReplyDelete