Saturday 29 April 2017

Another Dalek Joins The Ranks

You do meet the nicest people on Freecycle, I picked up the nice oval wide Dalek at the end of the line on the right this afternoon from Sue in Chipstead and dropped it down to my Mill Green allotment.

The large sack that I could just about lift of grass was hot to the touch and steaming as I used it to fill the new Dalek up to the top of it's little hatch with alternating layers of shredded paper and comfrey as an activator.

The paper supply on the plot is now exhausted, so look's like I need to do a little more clearing out in the office at home to produce more brown material.

Thursday 27 April 2017

Free Stuff


I always keep an eye on Freecycle especially for paving slabs and kerb edgings, this little photo popped up with the following note

"We have 9 concrete blocks used for garden borders available if anyone
wants to pick them up. They just need a bit of a scrub to get the moss
off them, but they're definitely re-useable. We are redoing our garden
and no longer need them."


I sent my request to give them a new home on my allotment and Neil emailed back letting me know that I could have them and that they were stacked in his front garden. They were retrieved this morning and taken to my Spencer Road plot and laid out along the boundary with my neighbour as there is a difference in height between our plots and it will tidy it up and nicely define the boundary between the plots.

My brother-in-law dropped off two giant woven sacks of grass cuttings last night and these were taken to my Mill Green plot as I had room in one of my the compost bins there, I have not emptied three of the five.

My sister also has a number of sacks of grass for me to collect and convert into compost so I decided I need another couple of compost bins, one on each plot.

I saw on Freecycle that someone was making a Dalek homeless and I am a sucker for Daleks especially when its a shape and size I don't already have so I offered to take it in and care for it and I've just been informed that I can rehome it.

I'm just waiting for an email with the address where to collect it from.

The assembled shelf for the extension to the shed has been screwed together and today had another coat of Red Cedar wood preservative and was basking in the sun this morning until the clouds came over and it started to rain so It had to be put under cover.

I also cut the shelf bearing blocks which will be screwed to the side panels. These again are timber from the wood store, which was salvaged from the contractors rubbish pile during the recent wet room conversion. The hinges cost me a 99p and oddly enough came from the local 99p shop. 

Wednesday 26 April 2017

What Is Comfrey?

Here are a few notes based on my own research and use of comfrey since 2013.

Comfrey has long been recognized by both organic gardeners and herbalists for its great usefulness and versatility; of particular interest is the "Bocking 14" cultivar of Russian Comfrey.

This strain was developed during the 1950s by Lawrence D Hills, and was my preferred type as it is sterile and can only be grown from root cuttings so it's not going to take over your plot from seeds spreading.

There are various ways in which comfrey can be used as a fertilizer. These include:

Compost Activator
Liquid fertilizer
Mulch or side dressing
Companion plant for trees and other perennials.
Production of potting mixture

Location of the Comfrey Bed

 A comfrey bed is basically a permanent feature with a lifespan in excess of 20 years on your plot or in your garden so getting the site right is fairly critical. Once established, killing off comfrey is very difficult unless you resort to chemicals.

On Mill Green allotment I made a comfrey bed in the corner of my plot under the shade of a tree, in an area where there were tree roots and it was not particularly useful for anything else really. 

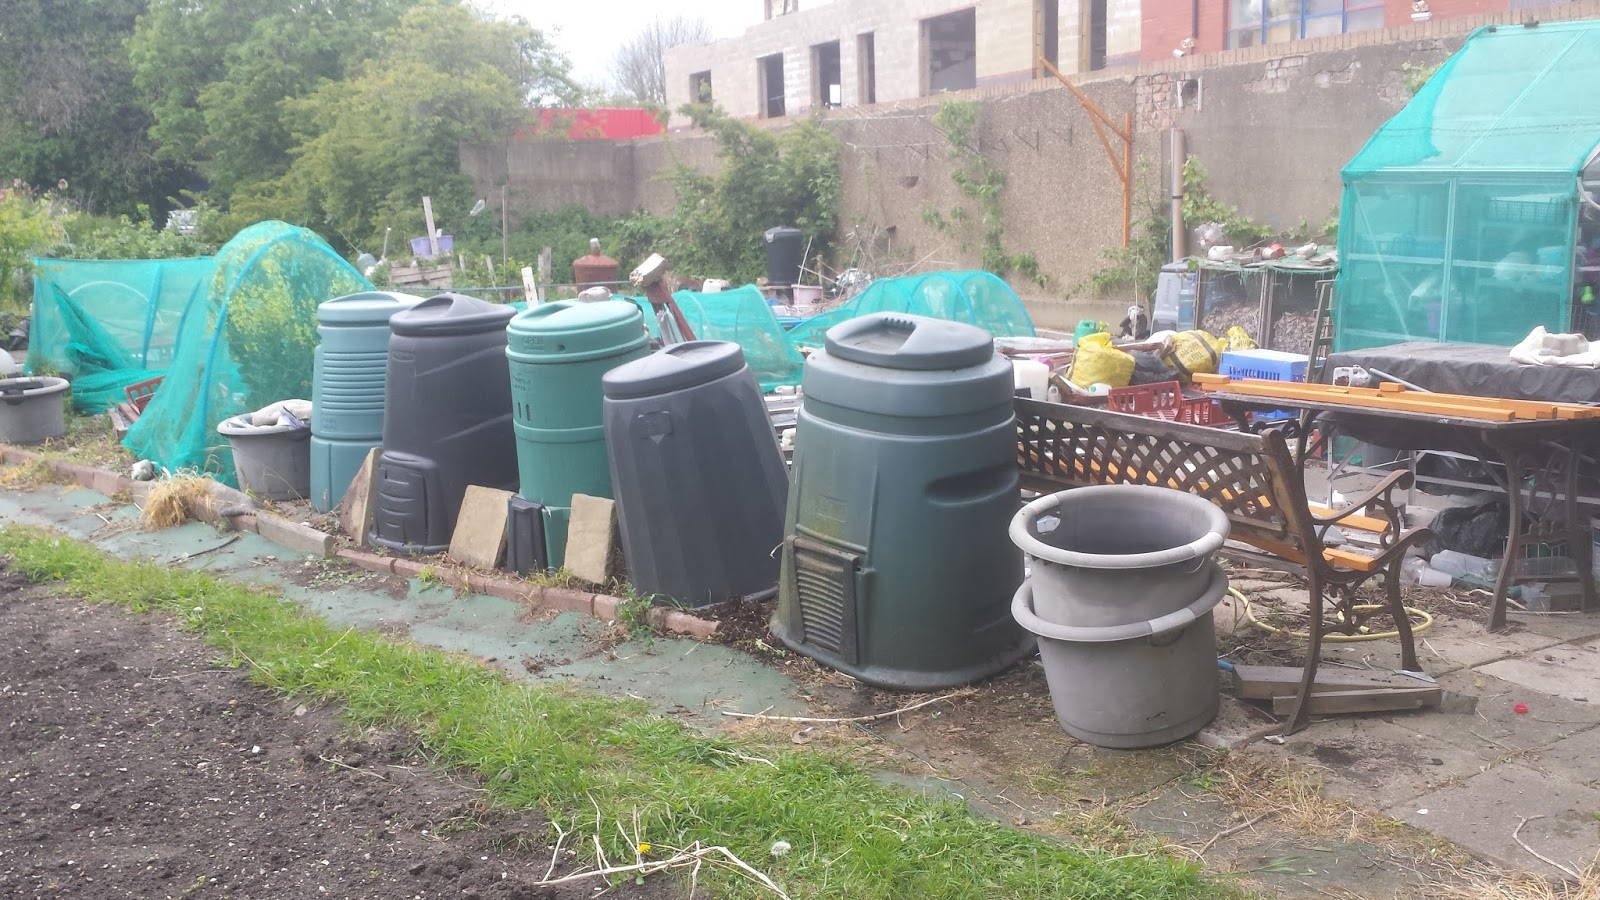
On Spencer Road I decided straight off the back to place two comfrey beds behind the Daleks at the back of my plot where it abuts the path in a compost making area to save the effort in transporting the cut comfrey to where it will be used. That's why the comfrey pipe and the comfrey water butt are all in the same area.

Harvesting Comfrey

In the first year (second for autumn planted) allow the plants to grow to the point where it throws up flower stalks and then cut back to about 150 mm (6″) from the ground.

Mature comfrey plants can be harvested up to four or five times a year, in the photo above which is comfrey in its second year, there is only 29 days between the two photographs. They are ready for cutting when about 600 mm (24 in) high, and, depending on seasonal conditions, this is usually in mid-Spring. Comfrey will rapidly regrow, and will be ready for further cutting about 5 weeks later.

Comfrey leaves have small prickly hairs on the leaves and stems that can cause skin irritation, so its worth wearing gloves and something with long sleeves when handling it. Because of these hairs I have found it sticks like manure to a blanket on your gardening gloves, so when I'm filling the comfrey pipe I use rubber gloves.

The best time to cut comfrey is shortly before flowering, for this is when it is at its most potent in terms of the nutrients that it offers, I use the coming of flowers as a cue to harvest. Comfrey can continue growing into mid-autumn, but it is not advisable to continue taking cuttings after early autumn in order to allow the plants to build up winter reserves.


Making Comfrey Tea

As mentioned above, it can be used in various ways, however a few thing to bear in mind the first of which is depending on how you produce your comfrey tea the liquid can stink like raw sewage as the comfrey decomposes. If you don't cover it up it attracts fly's as they think it is actually sewage.

Here is a link to Gardeners World site on how to make tea using a bucket with a lid and a weight, add water wait between 2 - 5 weeks, strain into a container, dilute with water to a weak tea looking colour. This was the first way I tried making my comfrey tea & feed, its very messy and smelly to do this way.

I then saw a post where it was suggested that you chopped up leaves and put in the milk bottle added water and waited for it to turn weak tea colour, but this took ages and then you had to dispose of the bottle once used or re fill and it was a real faff and didn't really work on an allotment level.  

Finally I saw and got recommendations from other allotment holders on forums about the comfrey pipe see previous post. No real smell when compared with the bucket & lid method, produces concentrated comfrey that I add to a water barrel so I have weak looking comfrey tea on tap.

I use a PowerBee Perfect Solar Power Pond Oxygenator in the barrel which I have found neutralises the smell, and obviously being solar powered cost me nothing to run.  

I hope you found this information useful, and if you have any more questions about comfrey or the pipe, please use the comment link below.

LINKS

After writing this post I found links on a chat on UK Here We Grow Facebook group to Permaculture News - Comfrey Believe The Hype and  Does Comfrey Really Improve Soil ? both are excellent articles and are very informative about Comfrey, Thanks to Myles Adams for posting the links.

Tuesday 25 April 2017

Grand Erections - Comfrey Pipe

Sorry if you found this post by the first part of the title in Google, but it's about gardening porn.


The comfrey is growing at an alarming rate and now I have onions in the ground that will need feeding, and the grass cuttings are starting to flow from all directions for composting, I really needed to erect the comfrey pipe. You may recall that in true Blue Peter fashion I made the end cap, bottle holder and weight last month.

So with my daughter working nights and being around this morning to keep an eye on the wife, I nipped into the allotment at about 7:15 this morning and used the auger to drill a hole next to the walking onion bed and positioned the 75mmx75mm fence post. 

Next I screwed the two side cheeks of the milk bottle holder and then the top plate with the slot for the silicon nozzle and end cap. I used two small steel angles to fix the side cheeks to the scaffolding board of the raised bed to offer a little more lateral restraint against wind, as this one is free standing and not fixed to the wall like my comfrey pipe on my Mill Green Allotment.

Two pipe fixings were screwed to the post, the cap tapped into place on the pipe and then the pipe offered up to the brackets and they were locked in place. 

All that remained was to cut up two square flower buckets of comfrey and fill the pipe to a level where the weight was visible but the bottom still supported by the pipe. A milk bottle was offered up so the nozzle was inside the milk bottle and a half brick slid under the bottle to keep it in place. 

A small amount of water was poured in the top of the pipe, and allowed to drip into the milk bottle, this was then poured over the walking onions, waste not want not. So now I have damp comfrey in full sunlight with a 2 litre bottle of sand under the influence of gravity compressing the comfrey. It will be interesting to see how long it takes before the weight starts to disappear into the top of the pipe and the black gold starts dripping into the milk bottle.


Photo of the two comfrey beds at the back of the allotment today

The same comfrey beds on the 26th March 2017  

Next job is to get the spare dustbin water butt over from my other plot so that I can have comfrey on draft.   

Monday 24 April 2017

Shelf Fabrication & Corner Connectors

I'm a bit of a squirrel in nature and I tend to keep anything that may be useful one day stored away. In my wood store are some timber bed slats,  two have been ripped up to form the ties to screw the timber batten shelf together for the extension to the shed, and the another to form corner connectors.


In the photo above the shelf is upside down. It will provide a great place dry out the onions once they are harvested.

In hindsight I should have bought another couple of roofing battens home, I've placed a couple of off cuts in, to see what it would look like with two extra timbers, and it defiantly needs them to be practical for supporting small flower pots in addition to trays and onions.


The rectangular bed slats corner connectors are to be painted and pre drilled so they can be used to fix roofing batten together to make a front timber picture frame that debris netting can be added too which will keep the foxes from sticking their heads and paws in the extension when it's being used as a cold frame/ hardening off or onion drying area.

I will take them to the allotment once they are drilled and painted and I can assemble the picture frame and paint it on site. I have some offcuts of debris netting at the Mill Green plot and will rescue some to be stapled to the frame.

Note to self  ~ pick up two more battens on your next visit to the allotment, pick up a couple of hinges when you visit the £1 shop.

Sunday 23 April 2017

Side Extension Continues

A swift Sunday morning visit to add some additional battens to the side panels at the top to fix the tri-wall polycarbonate sheet.

I'm going to make a frame up to fit into the front which will be held in place by a couple of toggle latches so a stop has been fixed to the inside of the side panels.

The two sacrificial feet were cut, sanded and all the timber and cuts was painted apart from the bottom tie, I did manage to paint the cut ends but I need to open another tin of red cedar shed and fence paint.

The bottom member has been positioned such that two double tray gravel trays can be slid under it.

As I was cook of the mess (when I cook it is a mess), and as my wife is still bed / first floor bound at the moment, my time on the plot in the morning was limited to getting the frame ready and painted so that it was dry for a second visit in the afternoon after lunch so that I could go back and fit the roof and the sacrificial feet.

As the shed has finally had a coat of paint I have fixed the plot numbers on the side of the shed.

I've bought the timber home to make the hinged shelving but it will not be needed quite yet as I have moved all of the cardboard that my brother-in-law had allowed me to store in his shed into the store as he is relocating his shed on Wednesday.

Saturday 22 April 2017

Shed Extension & Gallows Brackets


There was an Allotment Committee Meeting this morning on Spencer Road Allotment, so whilst waiting for everyone to arrive I moved the slabs that were up against the shed and finished painting the side, then I started on the erection of the extension to the shed.

The side panels are currently hung off the side of the shed and there is a small gap under the bottom, as I don't want to be in direct contact with the floor, but I will be adding some roofing batten feet that can rot and be replaced as necessary. The battens at the top of the extension will support the tri-wall polycarbonate sheet that I have to form the roof to the it, and it was cut to size in the afternoon at home.

Re shelving I have a couple of options, I have enough batten to make a removable shelf for when it is being used as a hardening off cold frame. or I have a couple of blow away frames that I could stick in there.

The shelf or blow away frames will have to be able to come out as I may also use it for growing tomatoes in there. The other use for this extension is to stack the food buckets of paper, coffee grounds etc. that I use for composting.   

Maggie also reminded me that I had not taken any Rhubarb from her plot, I know she said I could help myself but I really wanted to do it when we were both on the site. So I now have five sections of Rhubarb sitting in square flower buckets awaiting the formation of a permanent bed at the end of the allotment behind the walking and Air Onion beds.    


Later in the afternoon I went to the Mill Green Allotment to drop off the gallows brackets, but could not help but assemble one bracket and temporary cable tie it to the hanging basket brackets to see what they will look like up on the wall.

They will definitely need to be tied back to the wall with some new fixings as whatever it was that fell through the original bamboo structure knackered the fixings when it did.

Me thinks the gallows brackets need to come down about a 300mm - 400mm so that I can reach the end of the top member off the small two step set of steps.  .

Thursday 20 April 2017

Gallows Brackets Mass Production


If you can call 4 mass production ?

All parts to replace the cantilever frame on the second runner bean bed are now painted and assembled for transporting to the allotment for final assembly and erection, all the ends of the struts & joints are numbered. I will post a photograph when they finally make it up onto the wall at my Mill Green plot.

Best of all is that I acquired the timber roofing battens for free a few months ago, the screws and paint were in the shed so it's cost me nothing to build them, hopefully they will last longer than the bamboo version.

Wednesday 19 April 2017

Runner Bean Gallows Bracket

My daughter was on a late shift 2pm - 11pm yesterday, which means that she does not get home until about 11:30 and as a result tends to spend some time in bed in the morning resting and chilling if she has not got anything planed. I checked with her that I would be OK to leave her to keep an eye on the wife until mid morning.  

My body clock woke me up about 5:55 as usual, so a swift shower and breakfast and I was on Spencer Road Allotment by 7:15 with a tin of red shed and fence paint and started painting the ply panels that I had taken down for the side extension to the shed.

Looking at the door to the shed, the timber is already shrinking as it's drying out and getting sun bleached, so I thought whilst I had the paint and brush in my hand and I was waiting for the first side of the panels to dry I would paint the shed.

Then the thought struck me, the timber post for the comfrey pipe need a coat before I install it, and it needs erecting soon and the comfrey is growing like mad, so that received a coat of paint too .

Hang on a minute, I'm going to fix it to the walking onion raised bed, so that too got a coat of paint, by which time I could paint the other side of the extension panels as the first side was dry thanks to the sun. I continue with painting the sides and rear of the shed, then another coat for the comfrey pipe post.


On leaving the plot to come home I sorted out twelve number 1.2m length of roofing batten to make the gallows brackets for plot 1A to replace the broken bamboo cantilever bracket


Broken Bamboo Cantilever Bracket


So here is the template that I have come up with, another four to cut, drill and then paint then they will be ready for taking down to Plot 1A on Sunday Morning to be fixed to the existing hanging basket brackets that are on the wall.

I may need to add some additional steel angles to fix the vertical timber to the wall at the top and bottom, I will have to see how well they cable tie to the hanging basket brackets first. 

Tuesday 18 April 2017

Butternut Squash

Sown today in a self watering pop bottle propagator. Squash Queen Beryl over at Mudandgluts will be proud of me.  

Butternut Squash 'Butterfly'

Butterfly' is a classically shaped butternut squash, tan skin, thick neck, and fabulous tasting deep orange flesh. It's considered head and shoulders above the rest due to its great disease resistance and space saving, semi-bush habit. It yields plenty of 3.5 pound busty fruits that make a delicious substitute for pumpkin or even potatoes in many of your favorite recipes, and has very long storage potential in a cool, dry pantry. Maturity: 90 days

Squash 'Waltham Butternut' (Winter)
Duchy Originals Organic Seeds

Half-hardy Annual

This variety of Squash Waltham Butternut from Duchy Originals produces attractive tan coloured fruits with sweet, creamy yellow flesh.

Culinary note: Some parts of these flowers are edible.
Ideal For kitchen garden
Flowering Period:June, July, August
Sowing Months:April, May, June

Position: full sun

Monday 17 April 2017

Beautiful & Me On The Plot

I was up early like 5:55 and the plan was to visit Mill Green Allotment fist thing until around 10 when the wife and my daughter Kelly would likely surface from condensing snot. With the wife still unsteady on her feet and confined to the first floor, I knew if she had problem getting out of bed then my daughter was around to aid and assist.

It was dry, good me thinks, I had some breakfast looked again and it had rained. Bummox that that plan gone, then after a little while the rain stopped, and it started to dry really quick, so I risked it and went to Mill Green Allotment between 7:15 - 10:00

I had run out of flower buckets to empty the spoil from planting spuds, so ended up uncovering bed 13 and emptied all last years coir & compost and the spoil from the augured holes from planting the spuds yesterday then gave it a dressing of BFB & ground coffee grounds and raked it in then covered back over to help keep it warm and weed free. 

Beautiful my little Robin was all around me looking for tasty snacks, but today he was camera shy & I was too busy to take photos, and you lot know what a Robin looks like anyway.

I also managed to clear the weed from half of bed 14 as well this morning, so a couple of hours of work and quite a lot achieved. Me think a couple of hours 2-3 times a week very early in the morning if I can work it around my daughters funny shift patterns it going to be just the ticket. 

I need to collect some timber roofing batten from Spencer Road, being it home to make four gallows brackets to replace the broken cantilever Minty frame when I get a chance, first I need to find the bolts and wing nuts in the shed. 

  
In the afternoon I filled 30 polypots with compost and sowed my Lark sweetcorn, I know the forecast was for 0 degrees and possibly frost overnight, but the temperature only dropped as low as 9.0 - 9.2 degrees C in the grow station over night, and with the lights on for 30 minutes was already up to 10.2 - 12.2 degrees C and that's before the sun comes around and warms the brick shed and the timber door up.

Easter Sunday Planting Spuds

As my eldest daughter Emma was coming over to keep her mum company and to cook the Sunday Roast, I had already cooked off the roast beef and peeled the potatoes, plus sorted out the honey roast parsnips & Yorkshire pud for her. I managed a morning visit to Mill Green to try and get some spuds in the ground, I took the Charlottes with me for the SoilFixer Tests and a number of buckets with lids of Coir that were hydrated yesterday in readiness, however with the warnings of a frost and a general lack of room in the greenhouse and the growhouse being out of action and needing rebuilding I decided that that can wait until the end of the month when we should be frost free and that the order of the day was to get some spuds in the ground and to clear bed 5

Bed 5 was the strawberry bed and I have given up on trying to grow strawberries until I have the fruit cages up at Spencer Road, and grow them on elevated troughs and can protect them from birds, ants & vermin. Bed 5 was very weedy but it got cleared during the morning.


I saved egg sized potatoes from the varieties I grew last year and decided to see how well they produced this year. I will buy new seed potatoes next year, but it's got to be worth a go.

Sarpo Blue DanubeMain Crop -  unusual blue skinned variety with strong resistance to tuber blight.  The perfect roastie! went onto Bed 9, as usual I augured a hole but this year used the excellent compost fro Dalek 2 to line the bottom of the bore and fill to the top and not B&Q verve . I'm hoping the goodness in the compost will assist in the growth of the spuds. A layer of coffee grounds was sprinkled on top of the bore as a fertiliser and slug deterrent.


Sarpo KifliSecond Early - Blight resistant, white skinned second early crop,  Waxy potato with a new potato flavour all year round went into half of bed 8, I will need to sow the other half of bed 8 on another visit as I ran out of time and had to go home at 2:00 for my Sunday Roast dinner.

I have two more trays of spuds that are destined for beds 5 & 7 on future weekend visits to Mill Green.

Friday 14 April 2017

Easter Friday 2017

As my wife is now out of hospital but still very unsteady on her feet, and having to bed rest, it means that I'm a little house bound myself. 

It has been dry for a few days, but looked like the possibility or rain, so I took the opportunity of cutting the grass.

Emma my eldest popped in to see her Mum for a while, so I managed a quick hours visit to Spencer Road Allotment to drop off the sack and a half of grass cuttings.Whilst on the plot, I also managed to water the potatoes and onions and to make some milk bottle soft bricks ready to hold down the potato membrane sheet on bed four.

Once home again, I watered everything in the greenhouse and potted up tomatoes from their vending machine cups into larger pots and transferred them from the brick shed grow station to the bottom of the space saver greenhouse which is filling quite nicely.


It always amazes me that for some reason they look larger once potted up into larger pots from the vending machine cups.


I now have enough self watering pop bottle propagators for this year ready, especially as It looks like the greenhouse on Spencer Road will not be erected in time to be useful for bringing on plants this year.


The Air Onions really need to get in the ground, but I still have to dig the area and construct the bed for them. The North Holland Red Spring Onions in the middle of the picture are doing really well. The everlasting onions right at the back of the photo didn't live up to their name they appear to have snuffed it !


Until my onions start flowing from the allotment I have been buying them, I know, I know it goes against the grain. But I have thought I will try a little experiment to see if the bottoms cut off with long healthy roots will grow again a little like the celery does.


At the moment the sprouts are looking very good the cabbages and cauliflowers are not doing as well and I think a re sowing is in order whilst we still have time.

Wyvale used to have a bin where you could put your old pots, however it appears to have gone missing in their recent revamp of the garden centre exit, which is a shame as I used to get my larger pots there, and I'm all for recycling these kind of things. God forbid I may have to buy some!


Little Gem Lettuces planted out into a flower bucket

Thursday 13 April 2017

I'm First of Waltons 9 More Adventurous Allotment Blogs!


I have to say I'm very honoured that my Blog has been selected as the first of Waltons 9 More Adventurous Allotment Blogs

I have to be honest until I got listed I had no ideal who Waltons were or what they did, nice web site to look at with lots of high end and very expensive garden structures, especially of you are playing the If I won the lottery I would game. I'd love a garden structure office like they can provide that at the end of the garden.

It has to be said, I have never understood why anyone would pay so much money for a cold frame that appears to have been made out of decking boards, there again not everyone is into DIY.  

Wednesday 12 April 2017

Hell Girl Stops Allotment Play


It would appear that the wife is allergic to Penicillin and ended up turning bright red swelling and looking like one of the characters from one of her favorite movies Hell Boy.

So after a few more days in hospital, she is now finally home and shedding skin like a snake, but they have filled her with so much fluids to flush her system that she had gigantic blisters on her legs.

Bed rest for a few days as she is having trouble walking, so not looking good on the visiting the allotment front, as I need to look after my little pumpkin at home.

Saturday 8 April 2017

Blue Water Pipe & Netting

The question about how to construct Blue Water Pipe or MDPE Pipe hoops for netting venerable crops comes up all the time on forums and I thought I would put the information I normally supply here on my blog then I can just add a link and save keep repeating the answer and simply link here.


Here are a couple of early portable hoop frames I made up to support debris netting. My beds are all 2.4m x 1.2m or 8 x 4 feet in old money. These portable frames are 1.2x1.2m or 4ft square. The one on the right is made with 20mm dia pipe and only has a lateral tie at the crown of the arch. the one on the left is 25mm dia pipe and has a tie not only at the crown but half way down either side. This offers additional support and stops the debris netting form sagging too much when wet or covered in snow.

The height of the frame on the left is half the bed width or the radius of half a circle.


The Anti fox / bird chicken wire is 20mm and the beds are 1.2 x 2.4m

A common question is how long to cut the pipes for the hoops, in the portable hoop frames above is half the circumference of the circle where the diameter is the width of the bed or 1200mm so,


That's 3.14159 x 1200 = 3770mm divided by 2 = 1885mm you could call it 2m if you wish.

The next question is how high does the hoop have to be for different crops. Look at the back of the packs or on line to find out how tall your plants are going to grow. There is also another way of looking at it and asking the question;

How high would the frames be for different widths of debris netting?

Debris netting comes in different widths we know that a semi circle 600mm high on a 1.2m wide bed is 1885mm or nearly 2m so


Finding the leg height and overall height using a 3m wide debris net

3m - 1.885m = 1.115m
1.115m / 2 legs = 557mm leg height

Total Height 557 + 600mm = 1157mm or 1.157m

Finding the leg height and overall height using a 4m wide debris net

4m - 1.885m = 2.115m
2.115m / 2 legs = 1057mm leg height

Total Height 1057 + 600mm = 1657mm or 1.657m

I tend to push the ends of my tube 200mm into the ground so the length of tube for the hoop frame using 3m wide netting is going to be 200+557+1185+557+200 = 2699mm say 2.7m

Again for the 4m wide netting it's going to be 200+1057+1185+1057+200 = 3699mm say 3.7m long.


3m green debris netting on a bed which is 1.2 x 2.4 and the hoop is 25mm and is cut to a half circle plus two legs and 200mm either end for pushing in the ground. Some people use re-bar or bamboo pins that go inside the pipe, but to me that's just too much faffing about.

The lateral stiffeners on the top and sides help stop the mesh sagging especially when the foxes use it as a trampoline. or it gets wet, it also helps keep the hoops upright and resist wind load. 

This is the netting I use for cabbages and here it's covering onions


I was lucky enough to obtain some 2.4m long plastic trim from a window installers who were moving out of the industrial park beside the allotment because they were about to start building houses on it. I have pre drilled holes at the ends and at 800mm centres to accept a cable tie that will go around the blue water pipe. I also use the plastic trim at the bottom of the netting and galvanised tent pegs hold the netting down and stop anything getting in side the hoop frame. 


Here I have rolled the bottom of the netting up tight and put tent pegs over the netting to hold it down

This is a higher sprout netting and I've added lateral restraint at the horizontal quadrants or the springing points of the semi circle and further down between the legs to stop them spreading, there is also an off cut of blue pipe pushed in the ground and connected to the hoops to offer lateral bracing against the wind and foxes.


On this frame I have two nets joint at the crown as I didn't want to buy another roll of netting, the excess netting is either rolled up and then pegged down of held down with timber and soft bricks i.e. plastic milk bottles filled with sand.  

Other questions regarding Debris Netting and Blue MDPE Pipe are:

Q: Should I use 20mm or 25mm diameter pipe?
A: I have found that 20mm dia. pipe is fine for the small portable type hoop frames, but the larger Sprout frame has three number 25mm hoops and one 20mm hoop, it's the second one in from the right in the picture above, and is really quite floppy until I brace it between the other 25mm hoops, so I would recommend using 25mm pipe    


Q: where can I buy the blue MDPE Pipe?
A: Wicks, Toolstation, Screwfix or slightly cheaper if you order online from various places. Keep an eye out on building sites, they normally get rid of the excess pipe or pipe they have been using for temporary supplies at the end of the job. I have managed to get most of my blue pipe this way, but make sure you have a saw or cutters with you as the 25mm stuff can be a devil to roll up if you don't have a spare pair of hands and some cable ties. 

The roll in the picture above was rescued from the local rubbish tip when I went to dump some stuff

Q: Where can I get the debris netting?
A: see Working Out The Cost of Protecting The Crop

Q: How do you fix the hoops to the frame?
A: I drilled a pilot home in the pipe and screwed it on larger timber frame, I have used metal and nylon/ plastic pipe clips as well. If you do the 100x50mm timber frame you can bore/drill a hole in the top of the timber and push the pipe in the hole.

Q: I have seen different coloured pipes used on allotments what is the difference?
A: The blue pipe normally for water and is meant for underground and not uv stable - not that this matters too much when using it for hoop frames & houses.

The black pipe is uv stabilised but more expensive. Only really worth the extra cash if you care about the aesthetics

There's yellow pipe is meant for gas and again goes in the ground so is likely to not be UV stable but I don't think that it's any better than the blue and I would imagine is more costly. 


Q: How do I fix the netting to the hoops?
A: I tend to cable tie the netting using the little slots that are provided in the netting for this purpose to the lateral brace that I use at the crown of the arch between hoops this allows me to remove the tent pegs or soft bricks and roll the netting up on half of the frame and weed, then I drop it back re fix it and then do the same on the other side. 

Q: I have some green plastic (i think, or metal with a plastic coating) garden canes. I was thing about putting these in the ground and slotting the pipe on to it. How far into the ground and pipe do you think it should be to secure it?
A: I have seen people use steel reinforcing rods that will go inside the blue pipe 300 to 450mm long pushed in half way really depends on your soil. I just make a pilot hole and push the blue water pipe into the ground.  .

3M PPS Mixing Sticks Used As Bed Markers


I have been writing with a white paint pen on some 3M PPS Mixing Sticks that I have bought off ebay for £6.53 including delivery. They come in packs of 25 are made of black plastic and are 190mm long and 30mm wide.

These will go into the end of each bed so I don't have to keep going back to the plan to recall what's growing where and they will also be useful In making sure I don't prepare the beds in the wrong way, I've done that one before !

No Posts

The wife has been in hospital with pneumonia this week so not a lot of activity on the allotment, I have managed to sow a 40 module of shallots Prisma F1 hybrid and about 200 Performa Spring Onion seeds a tray of 15 vending machine cups. Both trays are in the portable LED Grow stations.

I've also managed to keep what's in the greenhouse & brick grow station hydrated between visits to the hospital.  I'm happy to say I now have her home where she belongs.

Monday 3 April 2017

Mill Green & Vintage Wolf Tools


I have to say I have been neglecting Mill Green somewhat recently in favour of Spencer Road, the fact that I have builders in and I have to be home to give them access has meant that I have not been able to squeeze in many extended lunchtime visits to either plot during the week which is really annoying especially when the weather is really good.

The paths desperately need re wood chipping, as they are now turning into quite good viable growing  medium, the problem is even if I could arrange a delivery at the moment there is no where for us to drop it without restricting access even more.

Redrow the contractor who is building next to us, offered to put in a pick up and drop off area that would assist Mencap dropping off plot workers in their care, and somewhere we can have manure and woodchip dropped off. The promises of it happening in 4 - 6 weeks just kept on rolling by last year and now I have been informed by the Site Agent it will not happen until the end of the project October/ November this year, which was not the objective, we were hoping to have the area at the beginning of the project so we can get out of the main construction site access road, and not get in their way or put our cars at risk.

So the paths around beds 7,8,9 & 10 have been weeded, as have the beds. Beds 8,9 & 10 have had a dressing of blood fish and bone and coffee grounds, I'm hoping the coffee grounds will hide the smell of the blood fish and bone which turns on the foxes and drives them wild.


Beds 8 & 9 have their potato planting membrane in place, and I need to tidy up around the tables and the patio area and weed around the Daleks, on the next visit when I intend to plant the potatoes that are happily sitting in the greenhouse but not chitting very fast.

Four containers of coffee came out from the extension to the shed and the lids were taken off during the day so that it could dry out in the sun. I make no apology for the fact that I have sprayed weed killer on the weeds in bed 5 and in the paths between Beds 1 - 4 and 13 - 16 and around the Daleks, As I said the paths need re wood chipping.


It appear that someone has tried to get over the wall from the building site and may have fallen through my cantilevering bean frame either that or the squirrels have put on a lot of weight recently. So another job to add to my list. I may have to buy some more bamboo or perhaps think about making a slightly more robust gallows bracket.


Keith & Pauline where on their plot and as usual supplied coffee during the morning and Keith even made one with his own fair hands! They have taken on the plot next to their original plot and during cutting back blackberries found a heavy duty gardening tool.


I said to Keith that it looked very much like my Wolf Soil Miller and looking at the shaft of the beast it has Wolf stamped on it !

He appears to have found the Ancestor of my Soil Miller which has lost a row of spurs and become much lighter during its evolution & development.  


In the afternoon I took the kneeling stool that I repaired yesterday, together with the hose pipe that I had brought home to drain the heating system back to spencer road and set up the watering system, and watered the spuds and onions. A hose is so much less hassle than the watering cans to use. I need to bury the hose pipe from the water tank & stand pipe in the access path to my plot, so that some numpty does not split it when strimming or trip over the thing when using the path.